
Confidently Create Garments that Fit
Developing a Handmade Wardrobe: Part 2 The Debra Knit Top
There is no question that knit garments are comfortable to wear and quick to sew but while most would say they are also "easy to fit", you may have found that it's difficult to determine what the final outcome will be. This week I'm continuing with the series on developing a handmade wardrobe. I'll share some tips on how you can determine the fit of your next knit project before you sew.
In Part 1 of this series I shared the Miranda Skirt by Style Arc. In my wardrobe plan I paired the Miranda skirt with the Debra Zebra Knit Top. As I mentioned in the last video, I'm quite happy with the results. While the skirt required very few fit adjustments, the Debra Knit Top was a little more involved, so today, I'll share with you how I determined the fitting adjustments I needed to fit the pattern before I sewed. If you missed Part 1 of this series, you can see it HERE.
When sewing with knit fabrics it's important to understand its properties. My first step is always to pre-wash the...
Developing a Handmade Wardrobe: Part I The Miranda Skirt
How is your new season sewing coming along? I've got quite a few pieces all made up and I can't wait to show you.
If you watched the most recent video series on How to Plan a Handmade Wardrobe that Works, you'll already know that the Debra Zebra Knit Top and the Miranda Skirt from Style Arc Patterns were on my make list. This week I'm going to show you how those turned out and focus in on the Miranda Skirt to give some details on how I made that pattern work for me.
Here's a look at the finished garments.
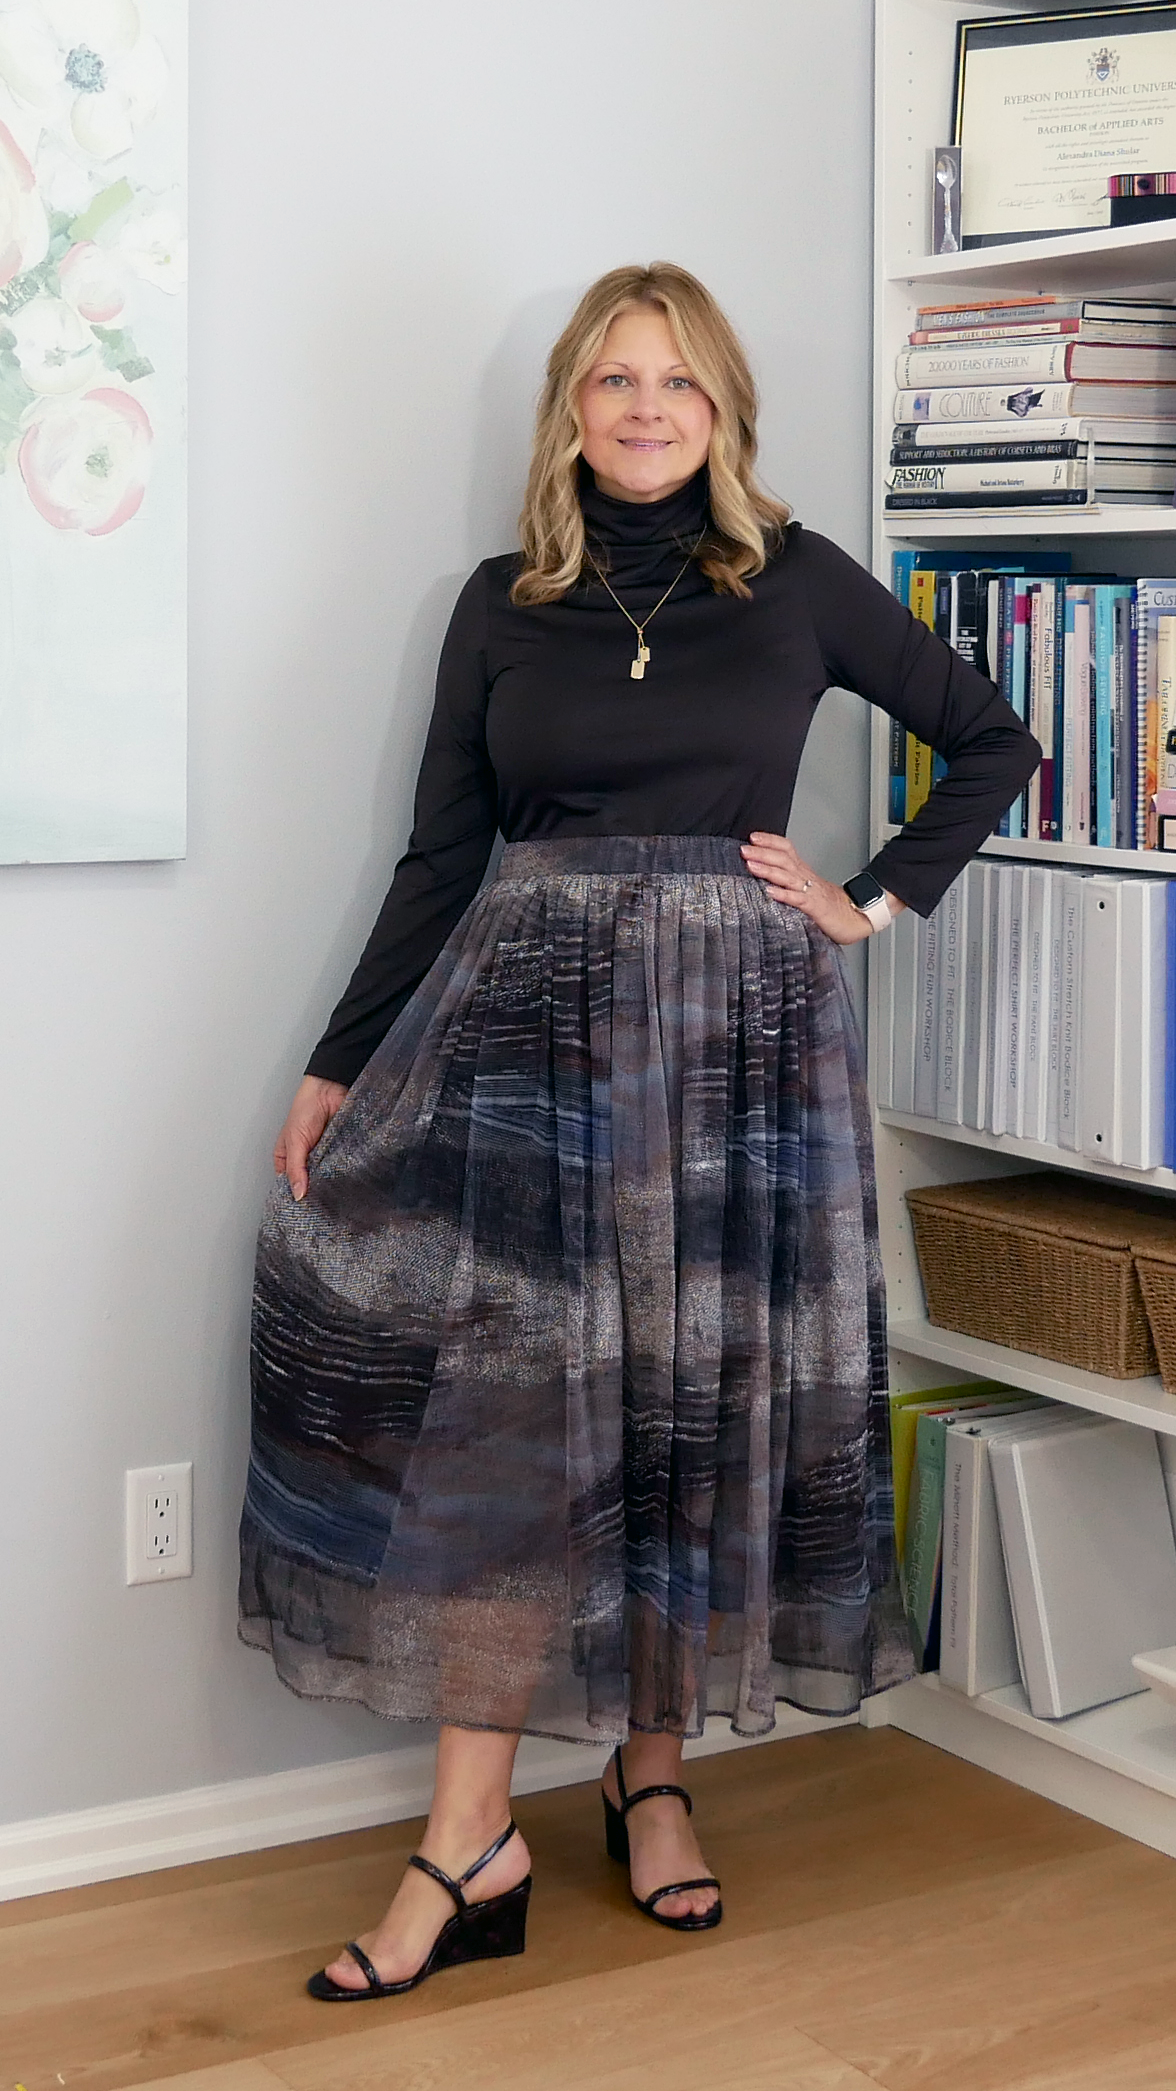
I'm very happy with the results, but rather than just show you the finished garments, I do want to share some details of how I approached the making of the Miranda Skirt. I definitely have some things to share about the Debra Knit Top, but I'll do that in a separate video.
The Miranda skirt went together quickly and easily after making a few key decisions about the fabric, the fullness and the length.
For fabric I chose a beautiful print chiffon from Gala Fabrics. The fabric...
How to Plan a Handmade Wardrobe that Works: Phase 4 Development
If you've been following along with this month's video series, you're likely starting to see how planning a handmade wardrobe can help you be more strategic with your pattern choices to make the most of your sewing time.
So far I've shown you:
- how to use a wardrobe guide to help you determine the types of garments that will work well together
- how to narrow down your pattern choices by being realistic about the clothing you actually need based on the events on your calendar
- how to determine the styling changes you might want to make for your silhouette, as well as how to strategically approach fabric shopping.
Today, I'll cover development, and outline the process I use to produce the garments in the wardrobe plan.
The development phase is all about creating each of the individual pieces in your handmade wardrobe plan, but to make the most of your sewing time, I suggest you break down the project into similar tasks so that you can work on several garments at the same time.
The very...
How to Plan a Handmade Wardrobe that Works: Phase 3 Conceptualization
Are you thinking about sewing for the new season yet?
If you are, stick around, we're about to begin Phase 3 of How to Plan a Handmade Wardrobe that Works. Today we're going to take a closer look at the patterns chosen in phase 2, decide on the styling changes we want to make based on our body silhouette, as well as the colors and fabrics that will pull all the pieces together.
If you missed the phase 1 and phase 2 videos, you might want to pause here and watch those first. I shared some great tips on how to decide on what type of patterns to look for and show to make your final selections so that you're ready for this part of the process.
Let's first look at pattern styling. I don't know about you but after choosing a pattern style, there are often subtle changes I want to make to the pattern to be more suited to my body shape and silhouette.
For example, I have a relatively hourglass silhouette and a larger cup size than standard so when I'm looking at a pattern style I know that...
How to Plan a Handmade Wardrobe that Works: Phase 2 Selection
If you've got a closet full of "me-mades" that you love but don't seem to be wearing as much as you intended, I've got some insights you can use to change that. This week, I'm sharing the 2nd phase of planning a handmade wardrobe that works.
Phase 2 is all about being realistic about the pattern choices made in Phase 1. If you missed last week's video, watch that one first to get a glimpse of the wardrobe ideation process, then jump back here to discover the criteria I used to narrow down my pattern choices and see my final pattern selections.
Now that I've gathered up the patterns for my handmade wardrobe, it's time to consider if they are the best choices and if I can realistically create the garments in the time I have available. The ideation process is fun and exciting, the selection process is a little more sobering so here are the criteria I use to narrow down my pattern selection to items that will work well together, that I'll actually wear, and that I'll have the time to...
How to Plan a Handmade Wardrobe that Works: Phase 1 Ideation
If you were to hang all your handmade garments on a single clothing rack, how many of those pieces would work together? Is there a garment hanging there that you love but you've never worn because nothing seems to go with it? Do the colors and prints even go together? If you've just realized that this may be a problem for you, keep watching. This video is the first of a series I'm doing on building a handmade wardrobe that works.
First of all, I'm not an expert on wardrobe planning. The questions I asked you earlier were the questions I asked myself, so I did some research and attempted to create a simple summer wardrobe. If you'd like to see the result of that, here's a link.
The Summer wardrobe experiment inspired me to try it again for Fall, but I wanted to make more intentional choices this time. In order to do that I did a search and stumbled across a company called Outfit Formulas. I'll leave a link so you can learn more about their offering, but my choice was to...
The Handmade Summer Wardrobe Review: With Links to Helpful Fitting Tutorials
I've been thinking about wardrobe building a lot lately.
My personal sewing time is pretty limited, so I want to make sure that what I make will fit seamlessly into my me-made wardrobe, so this week I'm sharing a review of all my summer sewing (some old and some new) with links to the video tutorials that will help you extend the life of your sewing patterns and put your own me made wardrobe together too.
Watch the video for a closer look at the items I made and how I managed to make them all work together to make the perfect summer wardrobe.
Pattern Links
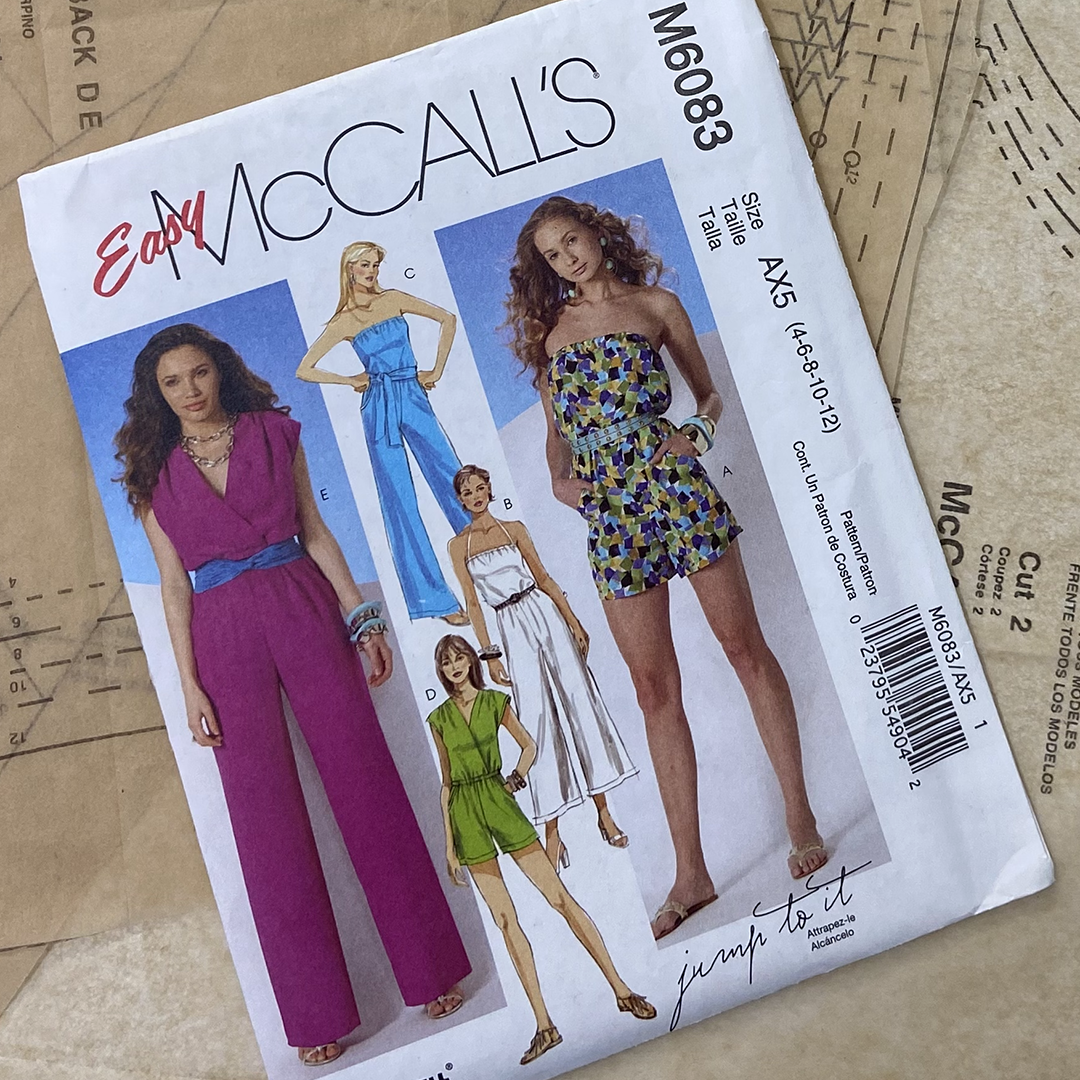
McCalls 6083 (out of print)
Lila (a mini class in fitting and pattern making)
Blossom: (pop over blouse) *re-issue coming soon, Blossom Blouse Review
Tutorial Links
How to Fit Before You Sew: Featuring McCalls 6083
How to Develop Pants from a Jumpsuit Pattern: Featuring McCalls 6083
How to Create a Tie Front Top - Featuring Lila
This month the focus has been on using one pattern to create as many garments as possible.
If you've been following along, you'll already know about the McCall's jumpsuit pattern that I also used to create a pair of super comfy and floaty pants. If you missed those, click the links below.
How to Fit Before You Sew - Featuring McCall's 6083
How to Develop Pants from a Jumpsuit Pattern - Featuring McCall's 6083
Today I'd like to share another variation on the Lila sewing pattern which, by the way, is already a mini class in fitting and pattern design. Not only will you get the sewing pattern, you'll also get video tutorials on fitting the pattern and several design projects that will show you how to take the pattern even further.
In this week's tutorial I'm showing you how to alter the Lila top for a tie-front hem. Let me show you how I altered the Lila pattern to create this tie-front detail.
Here are the final results. This version of the Lila top features the flutter sleeve...
How to Develop Pants from a Jumpsuit Pattern - Featuring McCall's 6083
If you’ve been following along, you’ll know I been doing some summer sewing lately. This week I’m sharing how I developed a super comfy pair of floaty pants from the McCall's 6083 Jumpsuit pattern.
Here’s a look at how they turned out.
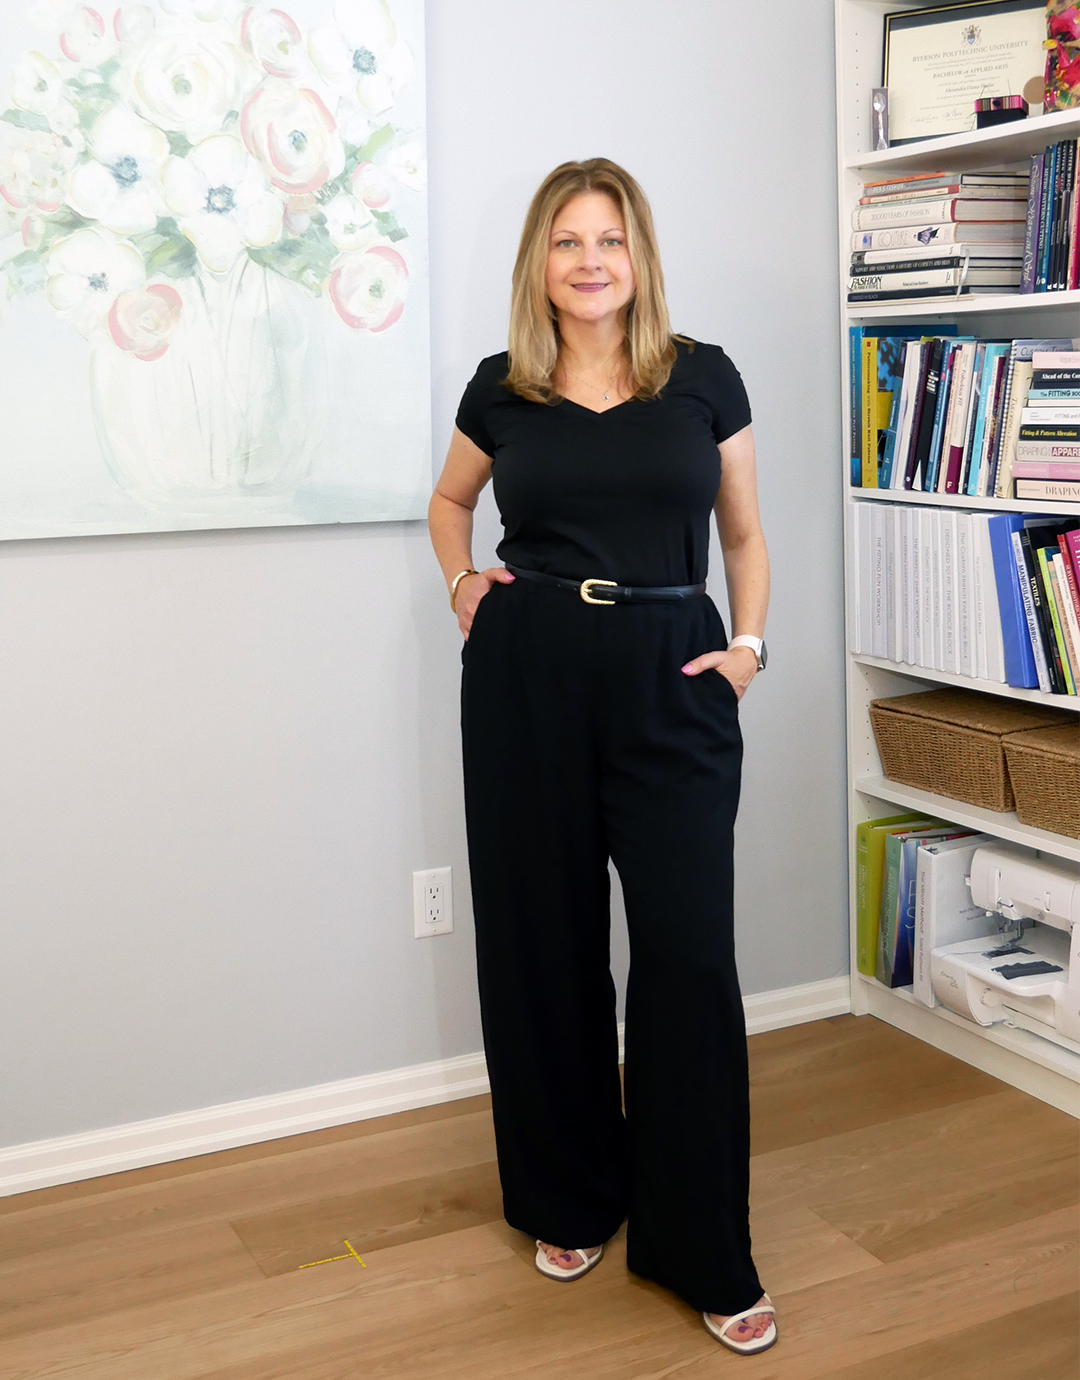
Watch the video now to see how it's done.
Did you enjoy this video? If you'd like to see more like this, let me know! You can subscribe to my youtube channel, message me via email at [email protected] or visit me on instagram @inhousepatterns. When you comment, like, follow and share on these platforms, you’ll get more of what you love in your feed and help others to find the content too. I would really appreciate it too.
Next week, I'll be sharing how I took the Lila sewing pattern and created yet another variation on the style. I hope you’ll tune in.
All My Best,
Alexandra
How to Fit Before You Sew - Featuring McCall's 6083
When do you feel most inspired to sew?
For me, the motivation is usually sparked by a change in seasons, a special occasion, an unsuccessful shopping experience or travel plans. I recently had a burst of sewing inspired by summer travel plans so I wanted to share what I made and give you a little “behind the scenes” view of the pattern work that allowed me to skip the sample and cut into the fashion fabric with confidence.
I was sure I was going to skip the jumpsuit trend this time around, but I found this pattern in my collection and it seemed the perfect piece to take on a summer vacation as well as an elevated way to stay comfortable throughout the entire summer. As an added bonus I already had the fabric and notions on hand.

Unfortunately this pattern is out of print, but I have no doubt you'll find a similar one if you're so inclined. Watch the video for a closer look at the pattern and a summary of how I altered the pattern to fit me without needing to sew a...

Pattern Making and Fitting Courses for Garment Makers
Dive deeper into pattern making and fitting with Alexandra by enrolling in an online course or workshop.
Categories
All Categories
