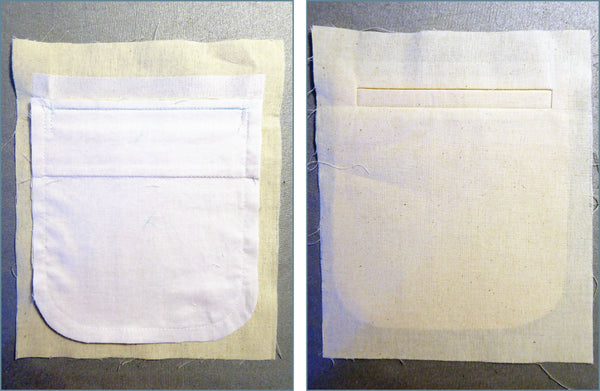
#63 How to Construct a Single Welt Pocket
A method you probably haven't seen before and the pattern pieces to help you practice the technique.
The Pattern Pieces
In order for you to follow along and practice this method of constructing the single welt pocket, I have prepared the patterns for you. They are in full scale so you can adapt them to any project you might be working on. The patterns I've developed will create a single welt pocket with a 1/2" welt and a 5" pocket opening.

Print out the pattern pieces and cut them out in the appropriate fabric, interfacing, and lining as indicated on the patterns.
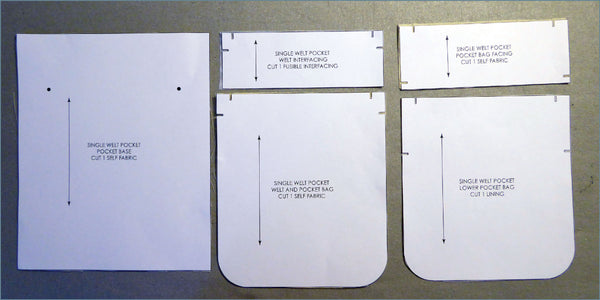
Tip: On fabrics that look similar on both sides, mark a small X on the wrong side of the fabric after cutting.
Transfer the Pattern Markings
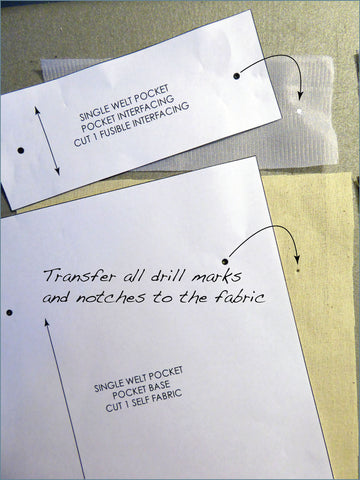
Transfer all the notches and the drill marks to the fabric pieces. I have used an awl to drill a small hole into the fabric. My sample pattern pieces are specifically designed so that the drill marks are set 1/8" inside the finished pocket opening which means this little hole will not be visible when the pocket is finished.
Fuse the Interfacing
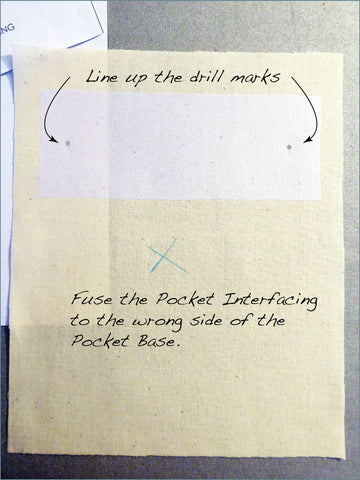
Place the Pocket Interfacing on the wrong side of the Pocket Base. Line up the drill marks of the interfacing to those on the Pocket Base and press to fuse into place.
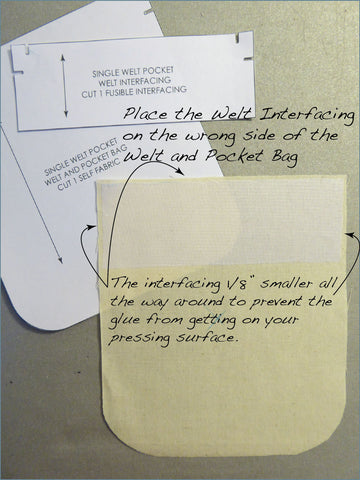
Place the Welt Interfacing on the wrong side of the Welt and Pocket Bag. You will notice that the interfacing has been drafted 1/8" smaller all the way around to prevent the glue from getting on your pressing surface. This is standard in fashion industry pattern making.
Prep the Welt
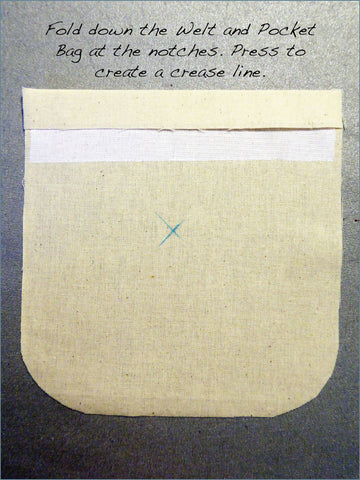
Prepare the welt by folding the Welt and Pocket Bag toward the wrong side at the notches. Press to create a crease line. This fold line will become the top edge of your welt at the pocket opening.
Add the Pocket Facing to the Pocket Bag Lining
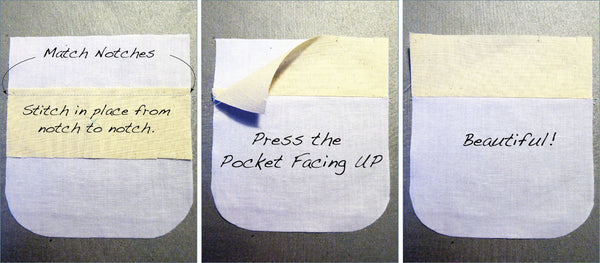
Place the Pocket Facing on top of the Pocket Bag Lining with the right sides together, matching the notches. Stitch the Pocket Facing to the lining by using 1/4" seam allowance, stitching from notch to notch as shown. Press the Pocket Facing up. You will have a beautifully clean finished pocket bag.
Mark the Pocket and Stitching Lines
To make your stitching extremely precise, use a ruler and chalk to mark the pocket position and stitching lines on each of the pieces as shown below. Taking time to do this now will help you create a single welt pocket that is an even depth and perfectly square at each end.
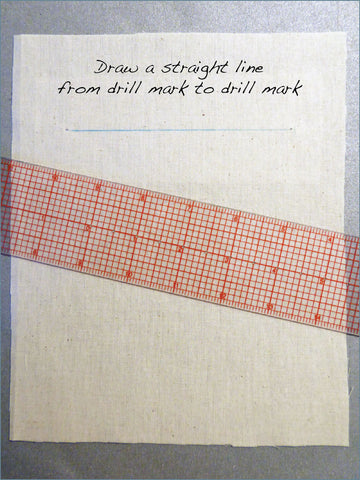
First, mark the pocket opening on the right side of the fabric by joining the drill marks with a straight line.
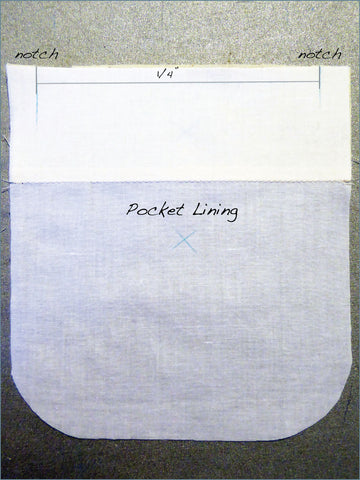
Then mark the stitching lines on the wrong side of the Pocket Bag Lining 1/4" in from the raw edge. The notches on the edge mark the starting and stopping points of the pocket opening. Draw a perpendicular line at these notches.
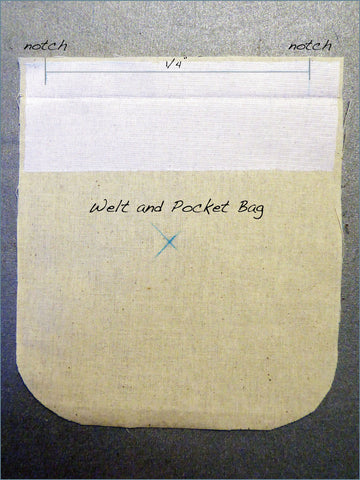
Repeat this process for the Welt and Pocket Bag piece.
Join the Pocket Bags to the Pocket Base
With the right side of the Pocket Base facing up, place the Pocket Bag Lining face down and line up the raw edge of the Pocket Bag Lining to the straight line on the Pocket base. Position the Pocket Bag so that the drill marks are 1/8" inside the notches.
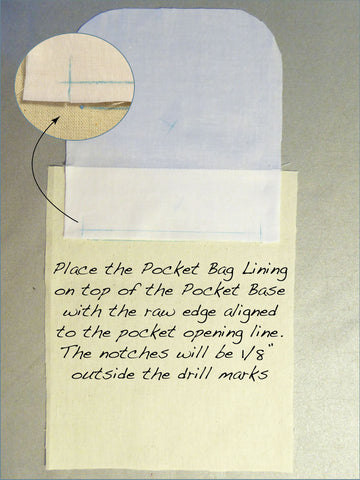
Stitch the Pocket Bag Lining into place starting and stopping EXACTLY on the cross marks at the notches.
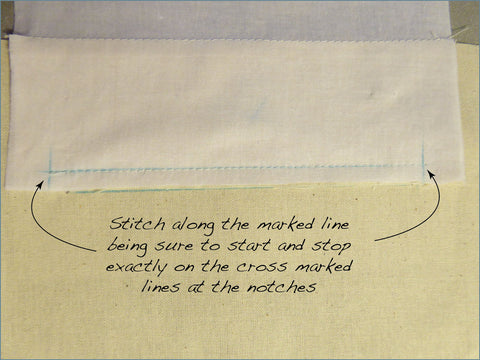
If you have not started and stopped exactly on those points, you have failed, (sorry) you will have to try again until you succeed.
Tip: Set the stitch length on your machine to "0" to create a lock stitch on the machine so you won't have to back stitch!
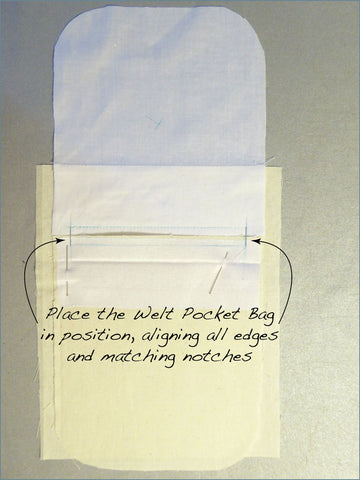
When you succeed, continue by placing the Welt and Pocket Bag into it's position by aligning all edges and matching the notches that indicate the starting and stopping points of the pocket opening.
Here is a closer view. Don't take any shortcuts here...you'll be sorry...
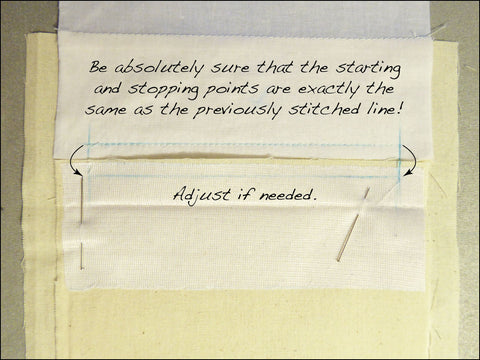
Once everything is aligned you can stitch the Welt and Pocket Bag to the Pocket Base. Again, you must start and stop exactly on those cross marks!
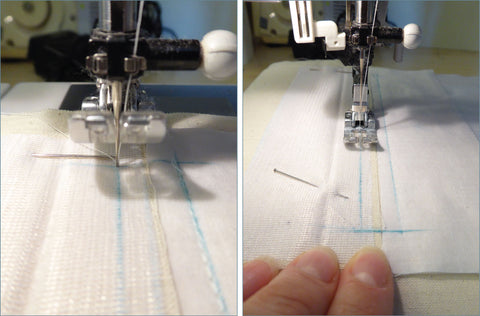
Check Your Work
Turn your work over so that you can see the wrong side of the Pocket Base. Your stitching lines should be even, 1/2" apart and begin and end at the same points.
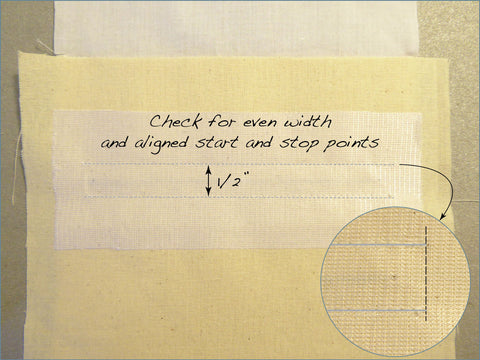
Cut the Pocket Opening
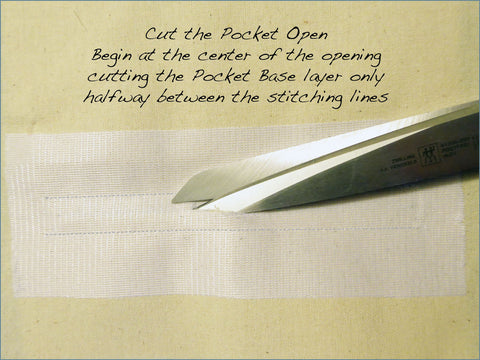
Now you will need to cut through the Pocket Base so that you can turn the pocket bags to the inside (wrong side). Begin at the center of the pocket opening area, make a short snip with the points of your scissors halfway between the stitching lines. Be sure you are only cutting the Pocket Base layer.
Continue cutting toward the drill marks at each end stopping 1/2" before reaching them, then snip in toward the stitching line at a 45 degree angle creating a Y shape at each end of the pocket opening. You must get very close to the stitching at each corner in order for the pocket to turn easily without puckering.
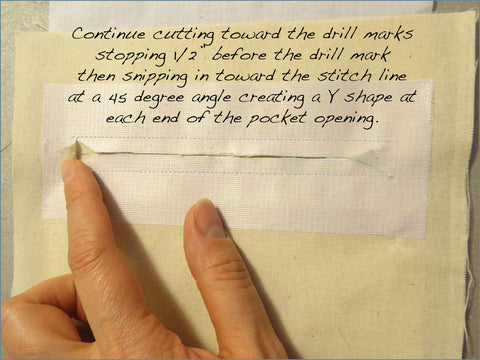
Turning the Pocket
Push the pocket bags through the opening you have just created. Your welt pocket is beginning to take shape!
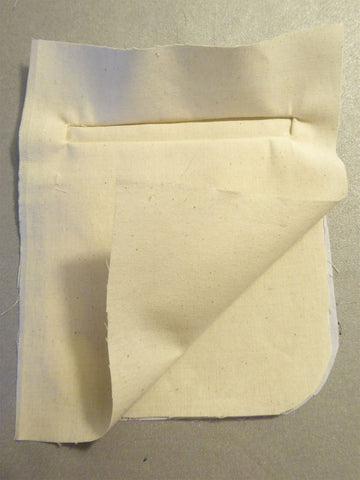
Flip the sample over and press each of the seam allowances open. Although these seams will ultimately be layered together, this step will give a nice clean line on the right side of the garment.
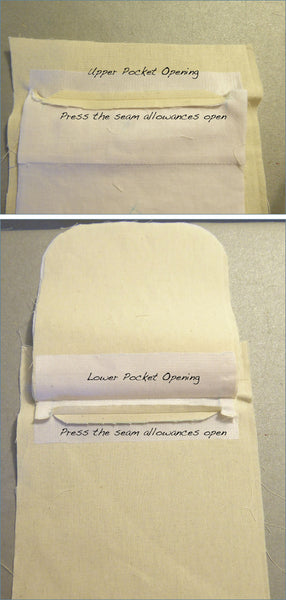
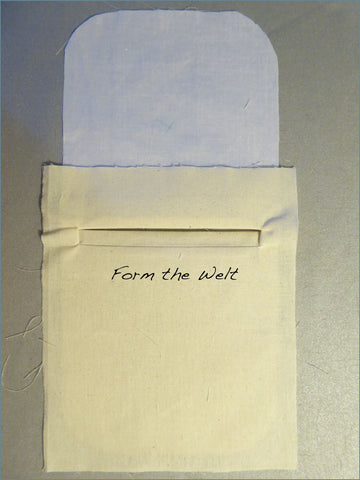
Form the Welt
Arrange the Welt and Lower Pocket to form the 1/2" welt. Straighten the ends of the welt so they are square and fill the opening.
With your work face up, fold the Pocket Base up and out of the way to expose the Welt and Pocket Bag seam. Keep the Pocket Bag Lining up and out of the way.
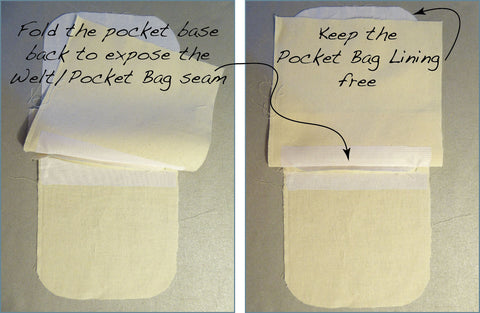
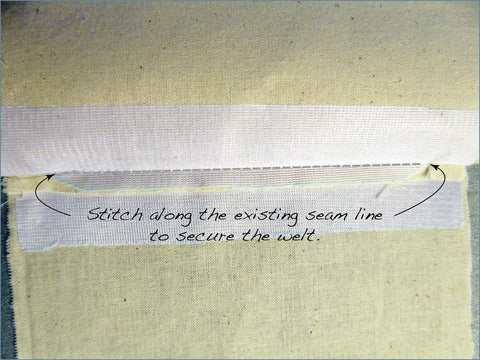
Stitch over the existing seam line through all layers. This stitching will secure the position and depth of the welt.
Secure the Pocket Ends
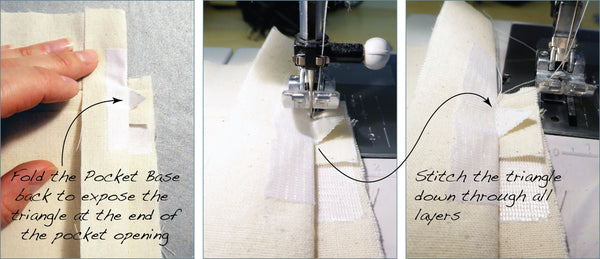
With your work face up, fold the pocket base back to expose the triangle and welt at the ends of the pocket opening. Use a short stitch length (1.5mm) to stitch across the triangle as close as possible to the fold. Repeat for the other end of the pocket opening.
Check Your Work
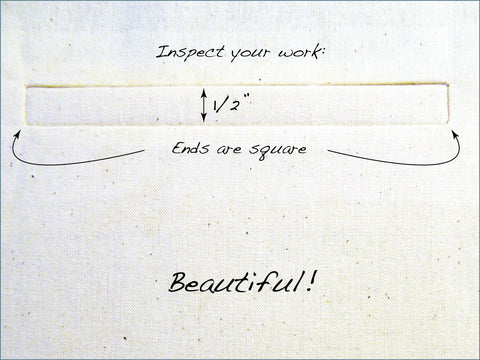
Give the welt a good press and inspect your work. The welt should be 1/2" wide, even along it's length and have nicely squared corners.
Completing the Pocket
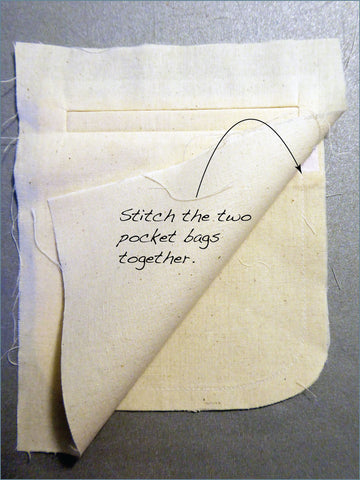
Smooth the Pocket Bag Lining and the Welt and Pocket Bag into position. Fold back the Pocket Base and stitch the two pocket bags together using 1/2" seam allowance.
Your Single Welt Pocket is now complete.